
Long Road - Setup Your Dev Virtual Machine (Part 2)
Warning: This post is outdated. It is here for reference purposes only.
This is the third of many posts about developing BCS Group's automated backup and restore system. This post builds off the previous post by going over how to setup the network adapters in a different way, how to setup your user to take advantage of sudo, and setting up a password-less connection via SSH.
Before We Get Started
There are a lot of ways you can setup your virtual machine with network adapters. Before my I can connect to my virtual machines the way I want to, I have to make a quick change. Note: This method is the quickest way to get it up and running and has some drawbacks, such as the IP address will be different on different networks, but will suffice for the purpose of this guide.
To make changes to your virtual machines virtual hardware, such as the network adapters, the virtual machine MUST be powered off. Once it has been shut down, select the virtual machine in VirtualBox and click "Settings". Click the Network option at the top and change the "Attached to:" drop-down from the default of NAT to "Bridged Adapter". This will make the virtual machine appear on the local network just like any other computer would.
Give Your User Sudo
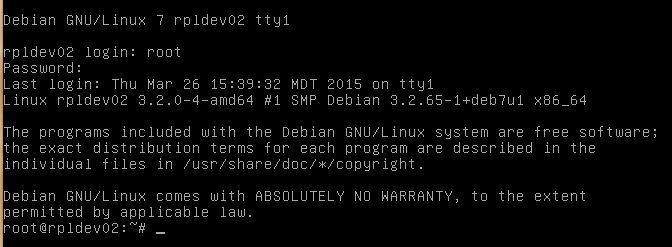
Sudo access allows your regular user to have "super user" abilities. Some people just use root for everything to avoid this but that is bad practice and establishes bad security habits. So, start by booting up your fresh virtual machine. When presented with the login screen type "root" and hit Enter. Then enter the password for the root user. Your screen should now look similar to this one.
Now that you're logged in to the vm as root, let's install sudo and add our regular user to the sudoers group. Remember to replace "asdfjkl" with your actual username.
apt-get install sudo
adduser asdfjkl sudo
Now to test it out you will need to log out by using the "logout" command (crazy, right!?) and log back in as your regular user, for me it will be asdfjkl. Once you're logged in, not as root, type this command to test that it works.
sudo apt-get update
You will be greeted with a message telling you to be careful with your new- found power and will prompt you for your user's password. Type it in and hit enter and you will see it go through a few lines pretty quick and return you to your prompt. That command didn't really do anything since we just installed the OS but it did verify that my user has been successfully added to the sudo group.
Enable SSH access
Now that my user asdfjkl has sudo power, my next step is to setup my host machine (Macbook running OS 10.8) to connect to the guest virtual machine using SSH and authenticating with my public key. This step is all about convenience for me, making my life easier because I want to access my virtual machines through Mac's built in terminal. If you're using a Windows host machine you will need to use a tool such as PuTty to accomplish this. This section assumes you have working knowledge of SSH and using public/private key pairs. If this is confusing to you, don't worry, I will write a more comprehensive post on that topic exactly!
Let's put our sudo access to good use and edit the SSH config to make sure we can log in:
sudo nano /etc/ssh/sshd_config
First find the line that with "AuthorizedKeysFile" and ensure it is not commented out (delete the # at the beginning of the line!). The entire line should look like this:
AuthorizedKeysFile %h/.ssh/authorized_keys
This tells ssh to look in the user's home directory under the .ssh directory in a file called "authorized_keys" for my public key. For this initial step I also need to make sure it will let my user log in using the password so make sure this line is also not commented out:
PasswordAuthentication yes
Now, hit Ctrl+X to exit nano and type "Y" to save the file.
Note: This is a potential security risk to leave like this on a production system, please do not use this configuration for anything that needs to be secure, or anything important in general!
Now, the last thing I need to know is my VM's IP address so I can connect to it. Again, we will need sudo.
sudo ifconfig
You should get some output that looks similar to my screenshot, but your mileage may vary.
eth0      Link encap:Ethernet  HWaddr 08:00:27:ae:18:2a
          inet addr:10.0.2.15  Bcast:10.0.2.255  Mask:255.255.255.0
          inet6 addr: fe80::a00:27ff:feae:182a/64 Scope:Link
          UP BROADCAST RUNNING MULTICAST  MTU:1500  Metric:1
          RX packets:39 errors:0 dropped:0 overruns:0 frame:0
          TX packets:51 errors:0 dropped:0 overruns:0 carrier:0
          collisions:0 txqueuelen:1000
          RX bytes:5891 (5.7 KiB)  TX bytes:4127 (4.0 KiB)

eth1      Link encap:Ethernet  HWaddr 08:00:27:8a:47:69
          inet addr:192.168.56.132  Bcast:192.168.56.255  Mask:255.255.255.0
          inet6 addr: fe80::a00:27ff:fe8a:4769/64 Scope:Link
          UP BROADCAST RUNNING MULTICAST  MTU:1500  Metric:1
          RX packets:115 errors:0 dropped:0 overruns:0 frame:0
          TX packets:72 errors:0 dropped:0 overruns:0 carrier:0
          collisions:0 txqueuelen:1000
          RX bytes:14609 (14.2 KiB)  TX bytes:10771 (10.5 KiB)

lo        Link encap:Local Loopback
          inet addr:127.0.0.1  Mask:255.0.0.0
          inet6 addr: ::1/128 Scope:Host
          UP LOOPBACK RUNNING  MTU:16436  Metric:1
          RX packets:1131 errors:0 dropped:0 overruns:0 frame:0
          TX packets:1131 errors:0 dropped:0 overruns:0 carrier:0
          collisions:0 txqueuelen:0
          RX bytes:180797 (176.5 KiB)  TX bytes:180797 (176.5 KiB)
The line we care about is under the "eth1" adapter and starts with: "inet addr:" Now armed with this IP address I head to my Mac's terminal to make sure my mac can see my vm on the network.
ping -c 3 192.168.56.132
You should see something like this as a response. (Note, the '-c 3' limits the ping command to 3 tries, otherwise it will go on forever until cancelled)
PING 192.168.56.132 (192.168.56.132): 56 data bytes
64 bytes from 192.168.56.132: icmp_seq=0 ttl=64 time=0.477 ms
64 bytes from 192.168.56.132: icmp_seq=1 ttl=64 time=0.573 ms
64 bytes from 192.168.56.132: icmp_seq=2 ttl=64 time=0.718 ms

--- 192.168.56.132 ping statistics ---
3 packets transmitted, 3 packets received, 0.0% packet loss
round-trip min/avg/max/stddev = 0.477/0.589/0.718/0.099 ms
Next step is to connect via SSH now that I know the IP address.
ssh asdfjkl@192.168.56.132
The first time you connect to a new server via SSH you will get a warning message saying the authenticity of the host cannot be established. This is expected and you will need to type "yes" (not just "Y") to continue. If you have done everything right up to now you should be prompted for your user's password on the virtual machine. Type it in and it should log you in!
Now that we know we can connect via SSH using our user's password, let's add the public key from our host machine to the authorized_keys file on the guest. I'm going to start by scp-ing my .pub file to my user's .ssh directory on the virtual machine.
scp keyfilename.pub asdfjkl@192.168.56.132:~/.ssh
Then, back on the vm, I send the contents from my .pub file into the authorized_keys file.
cat ryanlambert.pub >> authorized_keys
Now, I should be able to SSH into the VM without typing my password. I will only need my user's password when I use a sudo command.
This post went over some of the first setup steps I take on a new VM so I can work with it the way that's easiest to me. In the next post I go over the commands I run to install almost everything else I will need for development on this virtual machine.
 Mastodon