
Creating a Dev CentOS 7 Virtual Machine
Warning: This post is outdated. It is here for reference purposes only.
It's been a little over a month since CentOS 7 was released, and I have decided to give it a shot. I have been using Debian as my go-to Linux distro for a number of years now, but unfortunately Oracle's database platform is not supported on Debian. But, CentOS is a supported OS, and with a new version out... I might as well. Also, learning is good so why not!?
The goal of this post is to cover creating a basic CentOS 7 virtual machine that can be used for development purposes. The resulting VM is NOT fully configured or secure!
Create a CentOS Virtual Machine
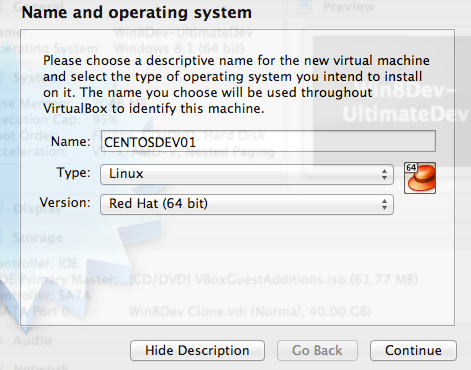
I started by going to CentOS.org and downloading the DVD ISO from a close-by mirror. The image is over 4 GB so plan your download accordingly. The other option is the "Everything ISO" and it totals at more than 7 GB! After it download I opened up VirtualBox and clicked "New".
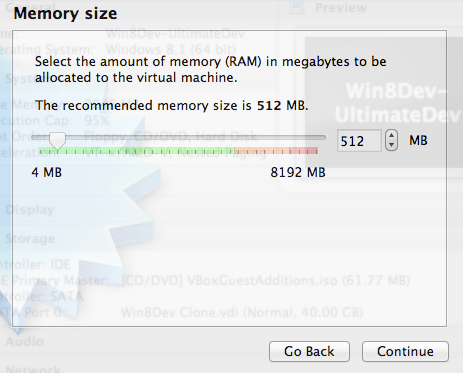
I give it 512 MB RAM:
Last, I created a 10 GB Dynamically allocated VDI hard drive for the virtual machine. I always use the dynamic option instead of fixed size, and it really pays off on Linux boxes. Most of my Linux VMs have a hard drive size of under 4 GB. (My Windows VMs... not the same story!)
Installing and Booting CentOS 7
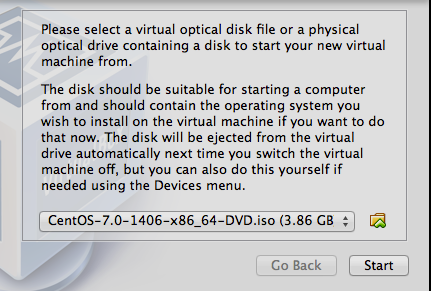
Now it's time to boot up the VM and install the OS. Click the "Start" button and you should see a screen similar to the image below. Click the little folder icon to browse for the CentOS image you downloaded. Once you've selected the appropriate image, click Start.
I selected the "Install CentOS 7" option because I'm feeling lucky and so I will skip testing the media. I guess I'll find out later if it bites me in the @#$. (Spoiler alert: It worked out fine! YMMV)
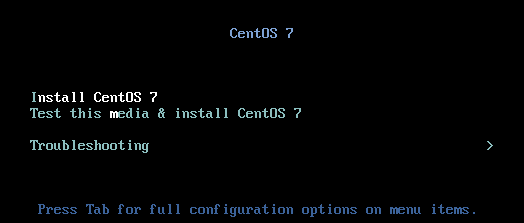
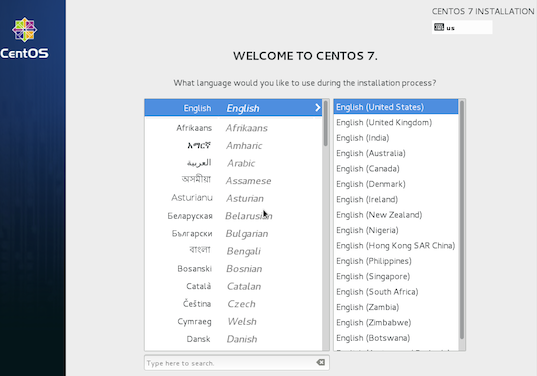
The first installer screen looks like it will be a friendly process.
Under Software Selection I choose the Minimal Install because I like to know how everything's installed, and keep that as minimal as possible. I tell it to enable the Ethernet which is the default NAT connection in VirtualBox that will allow it to connect to the Internet.
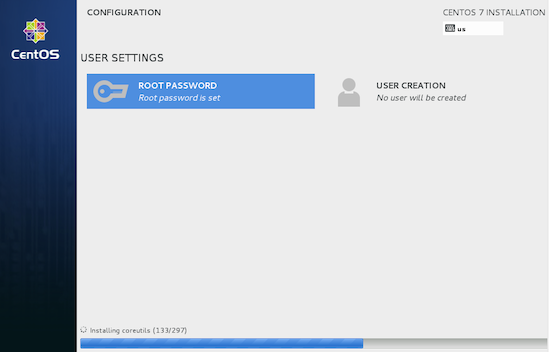
With those selections made I click "Begin Installation". I like that while it's installing everything it allows me to set the Root password and create a user. I'm not creating a user at this time, but did set the root password.
Once the installation completes you will get a success message and a button to reboot the system. That was pretty easy!
Create User and Setup Basics
After I login for the first time and poked around a bit, I created my main user so I can stop using the root login. Don't forget to replace "username" with your actual username.
/usr/sbin/adduser username
passwd username
Now to add my new user to the sudoers using visudo. Find the section that looks similar to below and add a line under root for your new user. Ensure you change "username" to your real username. From now on, all commands will assume you are NOT logged in as root and will use sudo as needed.
/usr/sbin/visudo

At this point I need to install a couple of things that the minimal install option omits. I personally want nano for my text editor and I need net-tools for ifconfig.
sudo yum install net-tools nano
Now it's time to start setting up my static IP for the Virtualbox Host-only network. I always set a static IP on a host-only network instead of a bridged network because I hate when the IP address to my VMs change. This way, I can work seamlessly on any router or without a router at all. This tutorial does not go over setting up the host only network or adapter in Virtualbox, only the configuration needed in CentOS 7.
Edit the hosts file to look like below. Replace 192.168.56.9 with the static IP you want your VM to have, and centosdev01 with the host name you intend to use.
sudo nano /etc/hosts

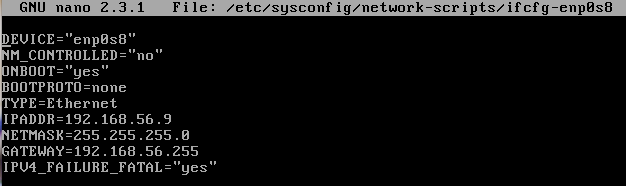
The next file is one of the bigger differences that I've noticed going from Debian to CentOS. Make the edits below, and note that a few things will need to change depending on your specific settings. The last part of the filename should match your device name, and the device should be the name given from ifconfig. I'm more used to names like "eth0", so "enp0s8" seems odd, but no biggie. Your IPADDR, NETMASK and GATEWAY should all reflect your environment. I set BOOTPROTO=none and NM_CONTROLLED to ensure that the network manager doesn't mess with my configuration.
sudo nano /etc/sysconfig/network-scripts/ifcfg-enp0s8
After you make these changes, reboot your machine.
sudo reboot
Test (and Celebrate)
My first test to ensure that my settings took hold was to log into the VM after it rebooted and run ifconfig to check for the proper inet address.

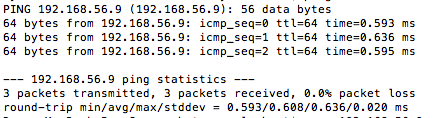
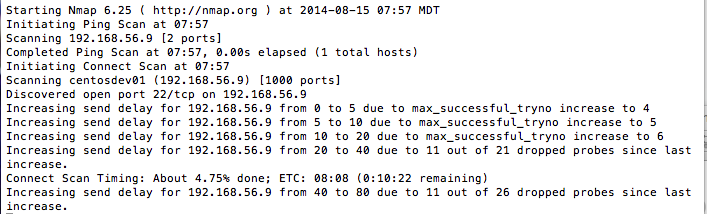
At this point I my CentOS VM is accessible from my host machine (OS X) using both ping and nmap.
ping -c 3 192.168.56.9
nmap -v 192.168.56.9
Wrapping Up
All in all, this installation was quick and the initial configuration was pretty painless. Before starting this, I was skeptical and had assumed that I would hit some major snags going from Debian to CentOS. The hardest part was getting the static IP configured and setup, but that was still relatively easy. To be fair, I did go through the full installation twice but that was only because I forgot to take a couple of the screenshots I wanted! All in all, the process of installing twice, taking screenshots and writing this post took less than 5 hours.
 Mastodon